The first time I packed a homemade wrap in my daughter’s lunchbox, she came home and asked if we could have it for dinner too. That’s the moment I knew I was onto something. Up until then, I’d been doing what most moms do — grabbing the pre-packaged stuff from the deli section, tossing in a juice box, and calling it a day. It was fine. But fine isn’t exactly the goal when you’re packing lunch for a kid who’s about to sit through six hours of school. They need something real. Something that actually holds them over.

- 2 cups cooked chicken, thinly sliced or shredded (rotisserie chicken recommended)
- 4 large flour tortillas, 10-inch burrito size
- 2 cups romaine lettuce, chopped into bite-sized pieces and patted dry
- 1/3 cup Caesar dressing, divided
- 1/4 cup freshly shaved parmesan (use a vegetable peeler on a block of parmesan)
- 1/2 cup croutons, lightly crushed
- 1 teaspoon fresh lemon juice
- Salt and black pepper to taste
- 1 teaspoon garlic powder (if cooking fresh chicken)
- 1 teaspoon lemon pepper seasoning (if cooking fresh chicken)
- 1 teaspoon olive oil (if cooking fresh chicken)
- Prep your chicken: If using rotisserie chicken, pull the breast meat and slice into thin strips or shred. If cooking fresh chicken, slice two thin chicken breasts and season with garlic powder, salt, and lemon pepper. Heat a lightly oiled skillet over medium-high heat and cook chicken for 4 minutes per side until cooked through (internal temperature 165°F). Remove from heat and let rest for 5 minutes before slicing.
- Warm your tortillas: Place each tortilla flat in a dry skillet over medium heat for about 20 seconds per side until pliable and lightly golden. Alternatively, wrap in a damp paper towel and microwave for 20 seconds. Work with tortillas while still warm to prevent cracking.
- Toss your romaine: In a small bowl, combine the chopped, dried romaine with 1 tablespoon of the Caesar dressing. Toss lightly to just barely coat the leaves without over-dressing.
- Layer in the right order: Lay a warm tortilla flat. Spread about 1.5 tablespoons of Caesar dressing in a thin, even layer across the bottom two-thirds of the tortilla, leaving the top third bare. Add the lightly dressed romaine in a horizontal strip across the center, then layer on the chicken strips, shaved parmesan, and finally the lightly crushed croutons on top. Squeeze a tiny bit of lemon juice over the chicken.
- Roll it tight: Fold in the left and right sides of the tortilla about 1 inch each, then roll firmly from the bottom up, pulling snugly as you go to form a tight wrap.
- Slice and pack: Using a sharp knife, slice the wrap diagonally across the center. Place the two halves cut-side up in the lunchbox. If packing ahead, wrap tightly in parchment paper or foil immediately after rolling to keep everything compressed and fresh. Pack with an ice pack, especially in warm months.
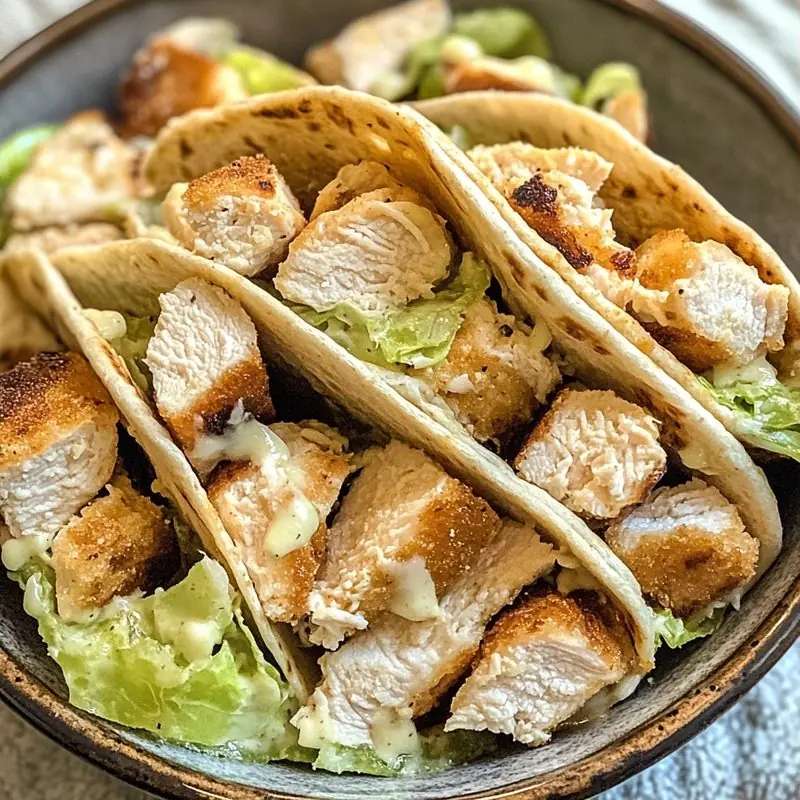
These DIY Lunchbox Chicken Caesar Wraps have become our Monday-through-Friday staple, and honestly, I make extras for myself almost every single week. Picture this: a big, warm flour tortilla loaded with tender strips of seasoned chicken, crisp romaine that still has its crunch even three hours later, freshly shaved parmesan, and just enough creamy Caesar dressing to make every bite rich without being soggy. Rolled tight, sliced on the diagonal so it looks fancy — this is the kind of school lunch idea that makes your kid the envy of the cafeteria table. The best part? You can have it built and packed in under twenty minutes, even on a chaotic Tuesday morning.
I know what you’re thinking — a Caesar wrap sounds more like a restaurant appetizer than a school lunch. But that’s exactly why I love it. It feels a little special, a little grown-up, and yet it’s completely approachable for kids. My daughter is eight and she actually helps me roll these up the night before. We’ve tweaked the recipe probably a dozen times over the last two years to get it exactly right: the chicken seasoning, the dressing ratio, the trick to keeping the romaine crispy. I’m sharing every single detail with you today so you can make it just as good — or better — on your very first try.
Why You’ll Love This Recipe
- Ready in 20 minutes flat. Even on the most chaotic school mornings, you can pull this together without breaking a sweat — especially if you use rotisserie chicken.
- Kid-tested and genuinely kid-approved. There’s something about a wrap that just works for kids. It’s portable, it’s not messy, and it tastes like something from a restaurant instead of a sad brown-bag lunch.
- Way better than store-bought. No mystery ingredients, no limp pre-dressed lettuce. You control every single thing that goes inside.
- Totally customizable. Don’t do Caesar? Swap the dressing. Not a chicken family? Use turkey or even canned tuna. This recipe is a framework, not a strict rulebook.
- Stays fresh until lunchtime. With the right assembly trick (I’ll show you exactly how to layer it), this wrap won’t turn soggy even if your kid doesn’t eat until noon.
What You’ll Need
One of my favorite things about this recipe is that the ingredient list is short and almost entirely made up of things you probably already have in your fridge. Here’s everything you’ll need to make four wraps — enough for the whole week if you prep on Sunday, or enough for a family of four at once.
- 2 cups cooked chicken, sliced or shredded — Rotisserie chicken is your best friend here. It’s already seasoned, already juicy, and it cuts your prep time in half. If you want to cook fresh chicken, thin-sliced chicken breasts seasoned with garlic powder, salt, and a little lemon pepper work beautifully.
- 4 large flour tortillas (10-inch burrito size) — Go big here. A smaller tortilla means less filling, and trust me, you want room to load these up. Whole wheat tortillas work great if you want to sneak in some extra fiber.
- 2 cups romaine lettuce, chopped — Romaine is non-negotiable for me. It stays crispier longer than any other lettuce, which is exactly what you need for a packed school lunch. Chop it into bite-sized pieces and pat it dry with a paper towel before assembling.
- 1/3 cup Caesar dressing — Use your favorite store-bought brand or make your own. I usually go with Ken’s Steakhouse Caesar on busy weeks, but I’ve linked my homemade version below. Either way, measure it — don’t free-pour, or you risk a soggy wrap.
- 1/4 cup freshly shaved parmesan — Please don’t use the stuff from the green can for this. A block of real parmesan, shaved with a vegetable peeler, makes such a noticeable difference. It melts slightly into the chicken and tastes incredible.
- 1/2 cup croutons, lightly crushed — This is the secret texture element. Lightly crushed croutons (not powdered, just cracked a little) add an incredible crunch without being chunky enough to poke through the tortilla. Garlic butter croutons are my pick.
- 1 teaspoon lemon juice — A tiny squeeze of fresh lemon over the chicken before wrapping brightens everything up. Don’t skip it.
- Salt and black pepper to taste
If you want to add more to these wraps, sliced avocado is amazing, and so is a strip or two of crispy bacon. My daughter goes through phases where she wants cherry tomatoes in hers, so we’ll halve those and tuck them in. The base recipe is perfect as-is, but there’s plenty of room to play.
How to Make DIY Lunchbox Chicken Caesar Wraps
Assembly is everything with a wrap. Follow these steps closely and you’ll end up with a tight, beautiful roll that doesn’t fall apart at lunchtime — which is the whole goal.
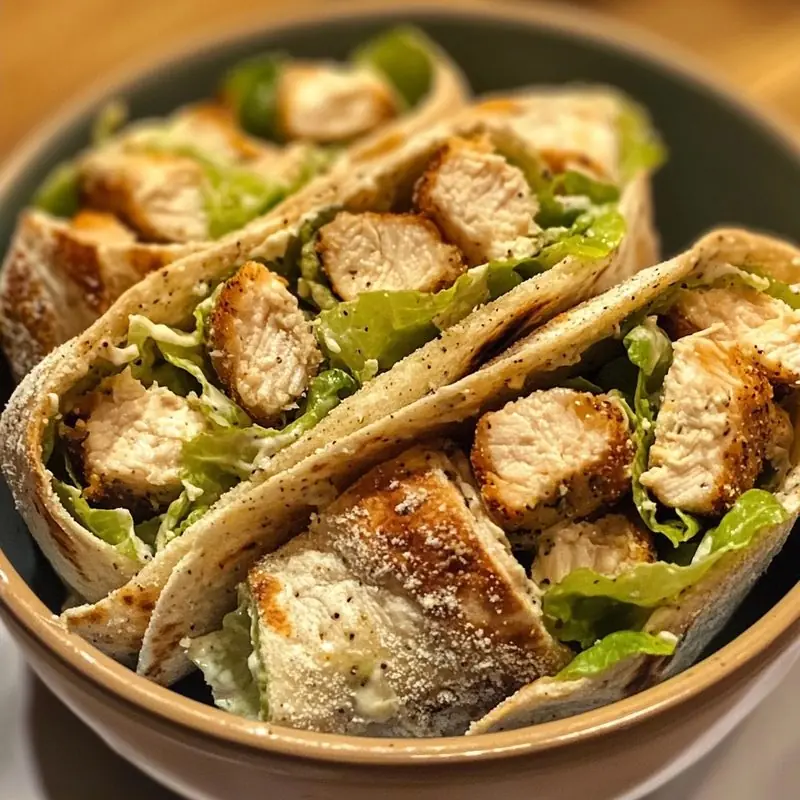
- Prep your chicken. If you’re using rotisserie chicken, pull the breast meat and slice it into thin strips or shred it — whichever your kid prefers. If you’re cooking fresh chicken, slice two thin chicken breasts, season them with garlic powder, salt, and lemon pepper, and cook in a lightly oiled skillet over medium-high heat for about 4 minutes per side until cooked through. Let the chicken rest for five minutes before slicing. This rest period keeps the juices in the meat instead of all over your cutting board.
- Warm your tortillas. Don’t skip this step. A cold tortilla cracks and tears when you try to roll it, which leads to a sloppy wrap. Lay each tortilla flat in a dry skillet over medium heat for about 20 seconds per side, just until it’s pliable and has a few light golden spots. You can also wrap them in a damp paper towel and microwave for 20 seconds. Work with them while they’re still warm.
- Toss your romaine. In a small bowl, combine your chopped romaine with just one tablespoon of the Caesar dressing. Toss it lightly — you’re just barely coating the leaves, not drenching them. This light pre-dress adds flavor without making the lettuce weep moisture into your wrap. Pat the leaves dry first, remember.
- Layer in the right order. Lay your warm tortilla flat. Spread about one and a half tablespoons of Caesar dressing in a thin, even layer across the bottom two-thirds of the tortilla — leave the top third bare so you have clean edges for rolling. Next, add your romaine in a horizontal strip across the center. Then your chicken strips, then your shaved parmesan, and finally your lightly crushed croutons right on top. The croutons go on last so they stay as crunchy as possible. Squeeze a tiny bit of lemon over the chicken before the final roll.
- Roll it tight. Fold in the left and right sides of the tortilla first — about an inch on each side — then roll from the bottom up, pulling firmly as you go to get a snug wrap. The tighter you roll, the better it holds together. If you’re making these ahead for school lunch, wrap each one tightly in parchment paper or foil immediately after rolling. This keeps everything compressed and fresh.
- Slice and pack. Slice the wrap diagonally in the center with a sharp knife. That diagonal cut isn’t just for looks — it exposes more of the filling so your kid can see exactly what’s inside, which somehow makes them more excited to eat it. Lay the two halves cut-side up in the lunchbox. Pack a small ice pack underneath the lunchbox container, especially in warm months.
If you love making hearty, satisfying wraps like this one, you’ll also want to check out my crispy baked chicken tenders — they make an incredible wrap filling too, and my kids request them constantly.
Tips, Storage, and Variations
Make-Ahead Tips
This is probably the most make-ahead-friendly school lunch I’ve ever come up with. On Sunday afternoons, I cook a big batch of chicken (or grab two rotisserie chickens), chop my romaine, shave my parmesan, and store everything separately in the fridge. Each morning, assembly takes literally three minutes. You can also assemble the wraps fully the night before — just hold off on adding the croutons until the morning if you want maximum crunch. Wrap them in parchment and refrigerate overnight.
Keeping the Wrap from Getting Soggy
The key is the layering order. Always put the dressing on the tortilla first, then the dry greens, then the wet protein, then the crunchy elements on top. This creates a barrier between the moisture-heavy ingredients and the tortilla. And always — always — pat your romaine dry before using it. Wet lettuce is the number one culprit behind a sad, soggy lunch wrap.
Variations Worth Trying
Once you’ve mastered the base recipe, there’s so much room to riff. Swap the chicken for sliced deli turkey and a smear of honey mustard instead of Caesar for a completely different flavor profile. Use a spinach tortilla for extra color and nutrients. Add a layer of mashed avocado under the dressing for a creamy, rich base. For a vegetarian version, roasted chickpeas seasoned with garlic and paprika are absolutely delicious in place of the chicken — crispy, protein-packed, and totally kid-approved. If your family loves this wrap situation as much as mine does, you’ll also love my easy turkey and avocado club sandwich for the days when you want something a little different in the lunchbox rotation.
Storage
Assembled wraps keep well in the refrigerator for up to two days, tightly wrapped in parchment or foil. I don’t recommend freezing these — the lettuce and dressing don’t survive the freezer well. Prepped components (cooked chicken, chopped romaine, shaved parmesan) stay fresh individually for up to four days in the fridge, making weekday mornings a total breeze. If you’re prepping for the whole school week, I’d suggest assembling two days at a time to keep everything at peak freshness.
What to Pack Alongside
The wrap is filling on its own, but a good lunchbox is a balanced lunchbox. We usually pack these with a small container of apple slices with a little peanut butter for dipping, a handful of pretzels or crackers, and a water bottle. For something sweet, a small square of dark chocolate or a couple of cookies rounds out the meal without going overboard on sugar. If you want another great lunchbox-friendly recipe idea, my homemade oat and honey snack bars are perfect for tucking into the side pocket of a lunchbox and they keep all week long.
Frequently Asked Questions About DIY Lunchbox Chicken Caesar Wraps
Can I make these wraps the night before school?
Absolutely — and honestly, that’s how most of our wraps get made. Assemble the full wrap, roll it tightly in parchment paper or foil, and refrigerate overnight. The only adjustment I’d make: if you really love the crouton crunch, tuck those in fresh in the morning. Everything else holds up beautifully overnight and the flavors actually meld together nicely after a few hours in the fridge.
My kid doesn’t like Caesar dressing — what can I use instead?
Great news: this wrap works with just about any creamy dressing. Ranch is the obvious swap and kids go absolutely crazy for it. Honey mustard is another winner — it adds a little sweetness that plays really well against the chicken and parmesan. Even a simple drizzle of olive oil and a squeeze of lemon keeps the wrap light and fresh without any heavy dressing. The Caesar flavor is classic, but it’s definitely not mandatory.
How do I keep the wrap from falling apart in the lunchbox?
Two things: roll it tight, and wrap it well. After you roll the wrap, immediately wrap it snugly in parchment paper — twist the ends like a candy wrapper — or use foil. This keeps it compressed so it doesn’t unravel. When you slice it, use a sharp knife and a confident single cut rather than sawing back and forth, which can displace the filling and loosen the roll.
Is this recipe nut-free and safe for schools with allergy policies?
The base recipe — chicken, romaine, Caesar dressing, parmesan, croutons, tortilla — is naturally nut-free. However, always check the labels on your specific Caesar dressing and crouton brands, as some are manufactured in facilities that process tree nuts. If your school has a strict nut-free policy, stick to brands that clearly label their products nut-free, and you should be completely in the clear. This is also a great recipe to pack if your school has a dairy restriction — just skip the parmesan and use a dairy-free Caesar dressing.
Can I use canned chicken instead of rotisserie or freshly cooked chicken?
You can, and I won’t judge you one bit — we’ve all had those mornings. Drain the canned chicken well, pat it dry with a paper towel, and season it with a little garlic powder, salt, and a squeeze of lemon to wake up the flavor. It won’t have quite the same texture as freshly cooked or rotisserie chicken, but it works in a pinch and it’s a perfectly solid option. If you want to make these wraps extra special and you have a little more time, though, I’d always reach for rotisserie first. The flavor difference is genuinely worth it. Speaking of simple weeknight proteins, my easy lemon herb baked chicken breast is another great option for batch-cooking chicken at the start of the week.
Make This Wrap Your Weekly Lunch Staple
Here’s what I want you to take away from this recipe: school lunch doesn’t have to be a chore, and it doesn’t have to be boring. These DIY Lunchbox Chicken Caesar Wraps prove that something genuinely delicious, genuinely nourishing, and genuinely kid-approved can come together in the time it takes to scroll through your phone in the morning. All it takes is a little prep, a warm tortilla, and a good roll technique. Your kid is going to love it — and so are you when you pack one for yourself and eat it over the kitchen sink at noon because you’ve earned that.
If you make these this week, I’d love to hear how it goes. Drop a comment below and tell me what dressing you used or any fun additions you threw in — I’m always looking for new combinations to try. And if you save this to your Pinterest board, you’ll have it ready every single school morning without having to dig through your bookmarks. Happy packing, friend. You’ve got this.