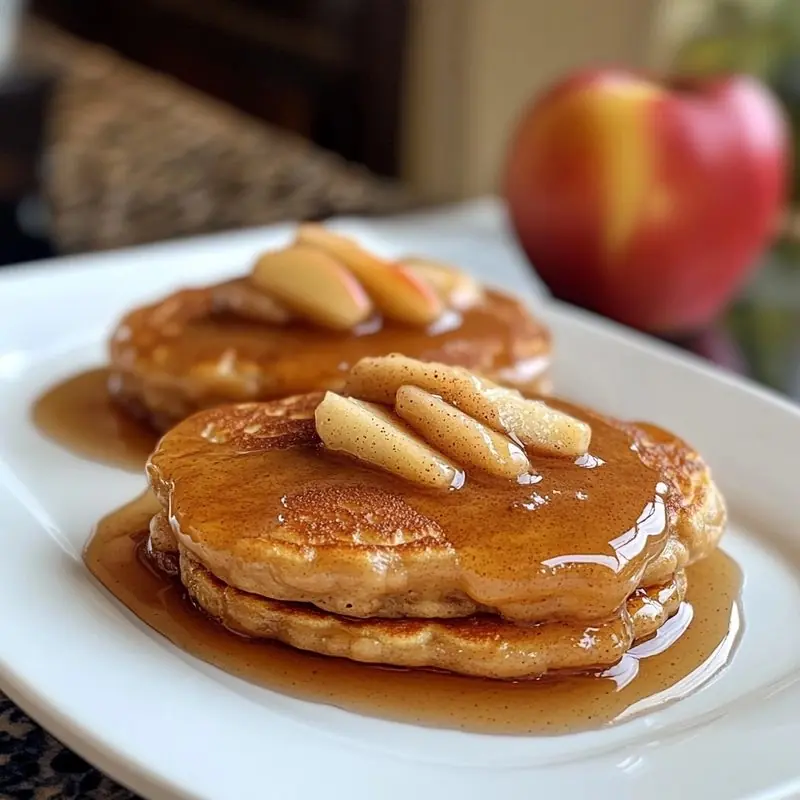
The first time I made these, it was a rainy Saturday morning in late October, and my whole house smelled like a bakery from the moment the butter hit the pan. I had a couple of apples sitting on the counter that desperately needed to be used, a craving for something warm and indulgent, and about forty minutes before my family started wandering downstairs in their pajamas. That’s how Brown Butter Apple Cinnamon Pancakes were born in my kitchen — and honestly, they’ve never left the rotation since.
- 6 tablespoons unsalted butter, divided (4 tablespoons for browning, 2 tablespoons for cooking apples)
- 2 medium apples (Honeycrisp or Fuji recommended), peeled, cored, and diced into ½-inch pieces
- 1 tablespoon pure maple syrup (for the apples, plus more for serving)
- 1 ¾ cups all-purpose flour
- 2 teaspoons baking powder
- ½ teaspoon baking soda
- 1 ½ teaspoons ground cinnamon, divided (plus a pinch for the apples)
- 2 tablespoons brown sugar, divided (1 teaspoon for the apples, remainder for the batter)
- ½ teaspoon salt, divided (plus a tiny pinch for the apples)
- 2 large eggs, room temperature
- 1 ½ cups buttermilk (or 1 ½ tablespoons white vinegar or lemon juice plus whole milk to the 1 ½ cup line, rested 5 minutes)
- 1 teaspoon pure vanilla extract
- Brown the butter: In a small light-colored saucepan over medium heat, melt 4 tablespoons of butter, swirling gently. Watch closely as it foams, then settles. Once golden-amber bits form at the bottom and it smells like toasted hazelnuts (about 2–3 minutes), immediately pour into a heatproof bowl and set aside to cool slightly.
- Cook the apples: In a medium skillet over medium heat, melt the remaining 2 tablespoons of butter. Add the diced apples, 1 teaspoon of brown sugar, a pinch of cinnamon, and a tiny pinch of salt. Cook for 4–5 minutes, stirring occasionally, until the apples are just tender and starting to turn golden at the edges. Drizzle in the 1 tablespoon of maple syrup, stir, and cook for 1 more minute. Remove from heat and set aside to cool slightly.
- Mix dry ingredients: In a large bowl, whisk together the flour, baking powder, baking soda, remaining cinnamon (about 1 ¼ teaspoons), remaining brown sugar, and salt until evenly combined.
- Mix wet ingredients: In a medium bowl, whisk together the eggs, buttermilk, and vanilla extract until combined. Slowly whisk in the cooled brown butter in a thin stream to avoid scrambling the eggs.
- Combine wet and dry: Pour the wet ingredients into the dry ingredients and stir gently with a spatula until just combined — stop as soon as no dry flour streaks remain. The batter will be lumpy; do not overmix. Gently fold in the cooked apples with just a few strokes.
- Rest the batter: Let the batter sit undisturbed for 5 minutes while you preheat your griddle or nonstick skillet over medium-low heat. Lightly grease with butter or neutral cooking spray.
- Cook the pancakes: Pour about ⅓ cup of batter per pancake onto the griddle. Do not spread or press. Cook until bubbles form across the surface and the edges look set and matte, about 2–3 minutes. Flip once and cook for another 1–2 minutes until golden on the bottom. Do not press down with the spatula after flipping.
- Serve immediately stacked with extra maple syrup, or keep warm in a 200°F oven on a baking sheet while you finish the remaining batches.
There’s something almost magical about the combination of nutty brown butter, soft sautéed apples, and warm cinnamon folded right into a thick, fluffy pancake batter. These aren’t your average Saturday stack. The brown butter adds this deep, toasty richness you just don’t get from regular melted butter — it transforms the whole batter in a way that sounds fussy but takes all of two extra minutes. And those apples? They cook down into tender, caramel-edged little bites that tuck into every layer of the stack. Every single bite has this cozy autumn comfort food quality that makes you want to pour a mug of coffee and just sit for a while.
I’ve made these for lazy weekend mornings, for my daughter’s birthday breakfast, and even for a fall brunch I hosted for a handful of friends. Every single time, someone asks for the recipe before they’ve even finished their plate. If you love cozy autumn comfort food that starts the day right, this is the breakfast that delivers — warm, filling, and just special enough to feel like a treat without being complicated at all.
Why You’ll Love These Pancakes
- That brown butter flavor is a total game-changer. It takes less than three minutes and turns an ordinary pancake batter into something that tastes like it came from a specialty brunch café. Once you try it, you’ll never go back.
- They’re made with pantry staples. Flour, eggs, milk, butter, baking powder — you almost certainly have everything you need. The apples are the only “special” ingredient, and they’re cheap and plentiful all fall long.
- Kid-approved and crowd-pleasing. My pickiest eater requests these by name. There’s nothing scary or complicated — just warm, sweet, fluffy pancakes with soft apple pieces inside.
- Perfect for a cozy weekend morning. The batter comes together in about ten minutes, and the whole recipe is on the table in under forty. That’s manageable even before your second cup of coffee.
- Make-ahead friendly. You can cook the full batch, stack them, and freeze the extras. Weekday mornings just got a whole lot cozier.
What You’ll Need
Let’s talk ingredients, because a few of these deserve a quick note before you start cooking.
- Unsalted butter (6 tablespoons, divided): Four tablespoons get browned for the batter, and two get used to cook the apples. Please use real butter here — the whole point of brown butter is the milk solids toasting, and that doesn’t happen with margarine or oil.
- Apples (2 medium): I love Honeycrisp or Fuji for this recipe because they hold their shape when cooked and have a natural sweetness that plays beautifully against the cinnamon. Granny Smith works too if you want a slightly tart bite. Peel them, core them, and dice into small ½-inch pieces so they tuck into the batter easily.
- All-purpose flour (1 ¾ cups): Standard AP flour is perfect. If you want to add a little whole wheat heartiness, swap up to half of it for whole wheat flour — the pancakes will be slightly denser but still delicious.
- Baking powder (2 teaspoons) and baking soda (½ teaspoon): This combo is what gives you that thick, fluffy lift. Don’t substitute one for the other — you need both.
- Ground cinnamon (1 ½ teaspoons): I use a heaping measure because I believe in cinnamon. You can also add a pinch of nutmeg or cardamom if you’re feeling adventurous.
- Brown sugar (2 tablespoons): Just a touch in the batter for warmth and a subtle molasses note. Granulated sugar works in a pinch, but brown sugar really does complement the apple flavor.
- Salt (½ teaspoon): Don’t skip it. Salt makes everything taste more like itself.
- Eggs (2 large): Room temperature eggs incorporate more evenly. Pull them out of the fridge about 15 minutes before you start.
- Buttermilk (1 ½ cups): Buttermilk is the secret to tender, fluffy pancakes with a very slight tang. If you don’t have it, make a quick substitute: add 1 ½ tablespoons of white vinegar or lemon juice to a measuring cup, then fill to the 1 ½ cup line with regular whole milk. Stir and let sit for five minutes.
- Vanilla extract (1 teaspoon): Real vanilla, please. It rounds out all the warm spice notes beautifully.
- Maple syrup (1 tablespoon for the apples): Just a drizzle when you cook the apples gives them a gorgeous glaze. Save more for serving, obviously.
How to Make Brown Butter Apple Cinnamon Pancakes
- Brown the butter first. In a small light-colored saucepan (light-colored so you can actually see the butter changing), melt 4 tablespoons of butter over medium heat. Swirl it gently as it melts. It’ll foam, then the foam will settle, and then — watch carefully — you’ll start to see golden brown bits forming at the bottom and smell a rich, nutty aroma. That’s exactly what you want. The moment it smells like toasted hazelnuts and the bits are amber (not dark brown), pull it off the heat immediately and pour it into a heatproof bowl to cool slightly. Don’t walk away during this step. Brown butter goes from perfect to burned in about thirty seconds.
- Cook the apples. In a medium skillet over medium heat, melt the remaining 2 tablespoons of butter. Add the diced apples, brown sugar (I use about a teaspoon here), cinnamon (just a pinch for the apples), and a tiny pinch of salt. Cook for 4–5 minutes, stirring occasionally, until the apples are just tender and starting to turn golden at the edges. Drizzle in the tablespoon of maple syrup, stir, and cook for one more minute. Set aside to cool slightly while you make the batter. Try not to eat them all straight from the pan. I’m serious — I’ve done it, and then you’re short on apples.
- Mix your dry ingredients. In a large bowl, whisk together the flour, baking powder, baking soda, cinnamon, brown sugar, and salt. Give it a good thorough whisk — you want everything distributed evenly so you don’t get a pocket of baking powder in one pancake.
- Mix your wet ingredients. In a separate medium bowl, whisk together the eggs, buttermilk, and vanilla extract until combined. Then slowly whisk in the cooled brown butter. If the butter is still very hot, add it in a thin stream while whisking so it doesn’t scramble the eggs.
- Combine wet and dry — gently. Pour the wet ingredients into the dry ingredients and stir with a spatula until just combined. This is the most important step to get right: stop stirring the moment you don’t see dry flour streaks anymore. The batter should look lumpy. Those lumps are your friends. Overmixing activates the gluten and makes your pancakes tough and flat instead of fluffy and pillowy. Fold in the cooked apples with just a few strokes.
- Rest the batter. Let the batter sit for 5 minutes while you heat your griddle or skillet. This gives the baking powder a head start and helps the gluten relax. The pancakes will be noticeably fluffier for it — don’t skip this step.
- Heat your cooking surface. Preheat a large nonstick skillet or griddle over medium-low heat. The biggest mistake people make with pancakes is cooking them on heat that’s too high. You want a steady, moderate heat that gives the centers time to cook through before the outside burns. Lightly grease with butter or a neutral spray.
- Cook the pancakes. Pour about ⅓ cup of batter per pancake onto the griddle. Don’t press or spread it — let it settle naturally into a round. Cook until bubbles form across the top surface and the edges look set and matte (not shiny), about 2–3 minutes. Flip once and cook for another 1–2 minutes until golden on the bottom. Don’t press them down with the spatula after flipping — that’s what deflates them.
- Keep them warm. As you work through batches, transfer finished pancakes to a baking sheet in a 200°F oven to keep them warm without getting soggy. Stack them when you’re ready to serve — that tall stack is part of the experience.
Serve with a generous pour of real maple syrup, an extra pat of butter if you’re feeling indulgent, and maybe a dusting of powdered sugar. If you want to go full cozy autumn comfort food mode, a dollop of whipped cream on top is never a bad idea. These pair beautifully alongside a crispy slice of bacon or a warm mug of spiced apple cider. If you love warming breakfast recipes like this one, you’ll also adore my fluffy pumpkin spice waffles, which have that same cozy fall energy in a completely different format.
Tips, Variations, and Storage
Tips for the Fluffiest Pancakes
Don’t overmix — ever. I know I’ve said it twice, but it’s the number one reason homemade pancakes turn out flat and dense. Lumpy batter equals fluffy pancakes. Trust the process.
Use buttermilk if at all possible. The acidity reacts with the baking soda to create extra lift. It also keeps the texture tender in a way that regular milk just doesn’t quite replicate.
Get your pan temperature right. If the butter sizzles aggressively the second it hits the pan, your heat is too high. Drop it down. Medium-low is your friend.
Don’t flip too early. Wait for those bubbles. I know it’s tempting to check, but patience gives you an even, golden crust.
Fun Variations to Try
Add toasted walnuts or pecans to the batter along with the apples for a lovely crunch that plays against the soft pancake texture. About ¼ cup of roughly chopped nuts is plenty.
Swap the apples for pears in November when they’re at their peak. The flavor is slightly more delicate and floral, and it’s absolutely gorgeous with the brown butter.
Make them extra indulgent by stirring a handful of caramel bits into the batter. They melt as the pancakes cook and create little pockets of gooey caramel throughout. Completely over the top in the best possible way.
Add a cream cheese drizzle instead of maple syrup: beat 4 oz softened cream cheese with ¼ cup powdered sugar and 2 tablespoons milk until smooth. Pour it over the stack and watch everyone at the table lose their minds. For another breakfast that uses that same cream cheese drizzle, check out my cinnamon roll French toast casserole — it’s an absolute showstopper for holiday brunches.
Make-Ahead and Storage
Refrigerator: Leftover pancakes store beautifully in an airtight container in the fridge for up to 3 days. Reheat in the toaster for crispy edges or in the microwave for 30–45 seconds for a softer texture.
Freezer: Let pancakes cool completely, then lay them in a single layer on a baking sheet and freeze until solid (about an hour). Transfer to a zip-top freezer bag with parchment between layers. They’ll keep for up to 2 months. Reheat straight from frozen in the toaster or a 350°F oven for about 8 minutes. This is genuinely one of the best meal-prep breakfasts you can have stashed in your freezer — especially once the school year ramps up and mornings get chaotic.
Make-ahead batter tip: You can mix the dry and wet ingredients separately the night before and refrigerate them. Combine them in the morning right before cooking. The apple filling can also be made ahead and stored in the fridge overnight — just warm it briefly before folding it into the batter.
Serving Ideas
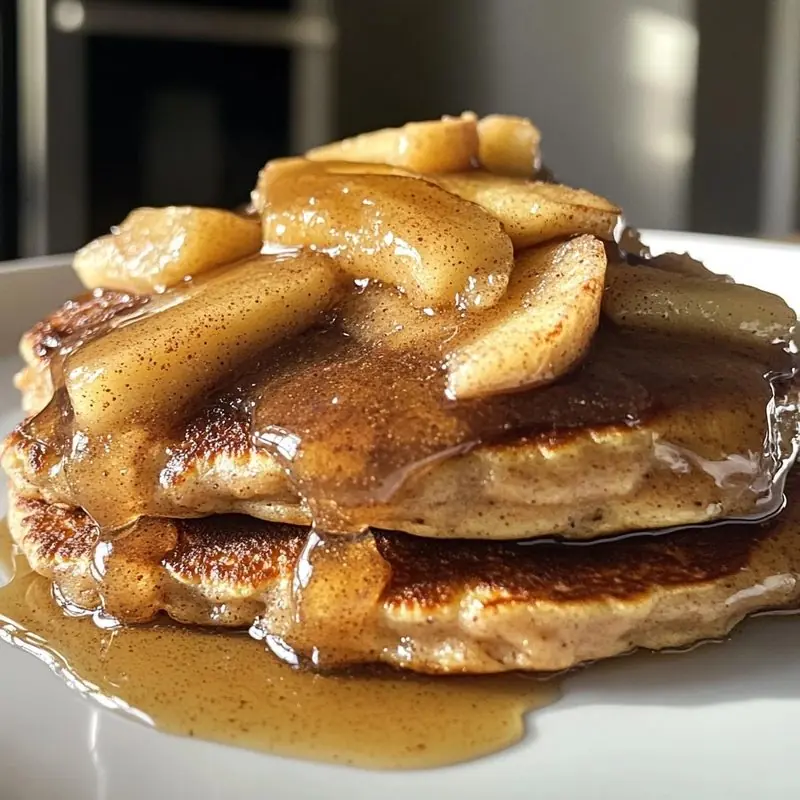
A tall stack drizzled with warm maple syrup is classic and perfect. But here are a few other ways to serve these that feel a little extra special: top with a spoonful of warm applesauce and a sprinkle of cinnamon sugar, serve alongside a sharp cheddar and egg scramble for a sweet-savory contrast, or set out a toppings bar for the table with syrup, whipped cream, chopped nuts, and sliced bananas. If you’re hosting a fall brunch, this is a wonderful anchor dish alongside my maple bacon sheet pan breakfast — the two complement each other perfectly and most of the prep can be done ahead.
Frequently Asked Questions About Brown Butter Apple Cinnamon Pancakes
Can I use a different type of apple?
Absolutely! Honeycrisp and Fuji are my personal favorites because they hold up well when cooked and aren’t too tart, but Gala, Pink Lady, and Braeburn all work wonderfully too. If you use Granny Smith, expect a slightly tangier flavor that actually pairs really well with the sweetness of the maple syrup. Just avoid very soft apple varieties like McIntosh — they can turn to mush in the pan before they get a chance to develop any color.
What if I don’t have buttermilk?
No worries at all — this is one of the easiest swaps in baking. Measure 1 ½ tablespoons of white vinegar or fresh lemon juice into a liquid measuring cup, then fill it up to the 1 ½ cup line with whole milk. Stir gently and let it sit for about 5 minutes until it curdles slightly. That’s your buttermilk substitute, and it works beautifully in this recipe. Full-fat yogurt thinned with a little milk is another excellent option that adds even more tenderness.
Can I make these gluten-free?
Yes! A good 1:1 gluten-free all-purpose flour blend (like Bob’s Red Mill 1-to-1 or King Arthur Measure for Measure) works really well here as a direct swap. The texture will be slightly different — a little more delicate — but the flavor is every bit as cozy and delicious. Make sure your baking powder is certified gluten-free as well, since some brands can contain trace gluten from shared facilities. I’d also suggest letting the batter rest a full 8–10 minutes with GF flour to give the starches time to hydrate properly.
Why are my pancakes coming out flat?
A few things can cause flat pancakes, and overmixing the batter is the most common culprit — those gluten strands tighten up and prevent the pancakes from rising. Also check that your baking powder isn’t expired (it loses potency after about 6 months once opened). Finally, make sure your pan isn’t too hot — high heat sets the outside too quickly and doesn’t give the center time to puff up. Medium-low heat and a rested batter are the two biggest factors in getting that tall, fluffy stack. If you want more fluffy breakfast inspiration, my classic buttermilk pancakes from scratch walks through all the technique in even more detail.
Can I make the batter the night before?
You can prep the components the night before, but I don’t recommend fully mixing the batter and refrigerating it overnight. Once the baking powder activates with the wet ingredients, it starts losing its leavening power — so pancakes made from fully-mixed overnight batter tend to be flatter. Instead, mix your dry ingredients in one bowl and your wet ingredients (minus the brown butter, which you’ll make fresh in the morning) in another, cover both, and refrigerate. In the morning, brown the butter, let it cool briefly, whisk it into the wet ingredients, and combine everything fresh. It adds maybe 3 extra minutes and makes a noticeable difference.
Make Them This Weekend
If there’s one recipe that captures everything I love about cooking in autumn, it’s these Brown Butter Apple Cinnamon Pancakes. They’re warm and familiar, but that brown butter twist makes them genuinely special — the kind of breakfast that turns a regular Saturday morning into a memory. I’ve watched my family go quiet at the table while eating them, which in my house is basically the highest praise possible. And knowing they’re made with simple, real ingredients — no boxed mix, no shortcuts that compromise flavor — just makes them taste even better.
I really hope you give these a try this weekend. When you do, I’d love to hear how they turned out! Drop a comment below and let me know if you tried any of the variations, or if your family loved them as much as mine does. And if you’re saving recipes for your next cozy autumn brunch spread, please pin this one — it’s a recipe you’ll come back to all season long, I promise.